
In a business, issuing receipts is highly important. Giving out receipts help to give you and your customers a copy of the transaction and it makes tracking of the sale much easier in cases or reimbursements or replacement. Typically, small time business owners will manually write down receipts in ready-made sales receipt templates. While this may not be a wrong way of keeping a record of the transaction, there might be a chance that you will lose that tiny piece of paper. This makes it very inconvenient come the time where taxes need to be filed or when you need to start preparing your financial statement forms. Clutter will also be quite a headache and nobody really wants to go through clutter just to find a transaction receipt!
One simple solution? Inputting the details of the transaction in a digital or electronic template, printing out the receipt, and saving a digital copy for yourself. Digitally saving a copy of your receipts makes it easier to track any transactions. It will also be easier to organize, plus, you can customize the template according to your preferences. Wouldn’t it be nice to just be sitting down on your desk and quickly search your computer for receipts?
You may now ask, how you will be able to come up with a digital copy and a printed copy to hand out to customers at the same time? Do you need to buy a fancy software to do so? The answers might probably already be on your computer. What are we talking about? Microsoft Excel!
If you have not been using Microsoft Excel for your business transactions, then you are missing out on a lot of things! Excel is capable of performing various computations and financial calculations. Plus, there are a lot of financial report templates readily available in the application and this includes templates for business receipts. These templates come with pre-embedded formulas to make calculations automatic. You may also make use of downloadable templates available on the Internet.
If you are someone who is looking to transition yourself to a more organized manner of keeping track of your receipts, you are definitely on the right path—and the right article! We will give you a detailed step-by-step guide to making your own receipt template from scratch, making your own template from pre-made templates, and how to add formulas to specific cells for automatic calculations. We also have free receipt templates available for download right on this very page. They are already in .xls and .xlsx format so they will definitely be compatible with Excel. This file format makes it easy to edit and customize according to your business needs. Read up and find out how you can make your very own business receipts through Excel.
Sample Daily Summary of Cash Receipts

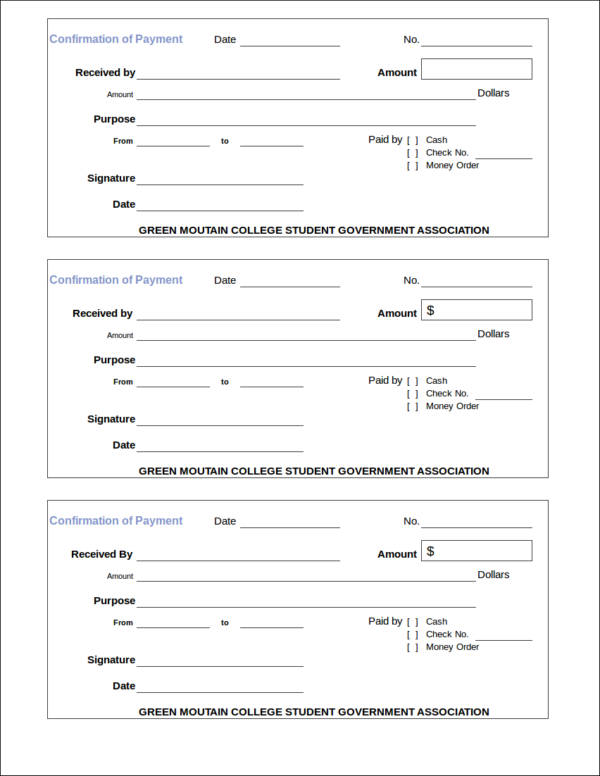
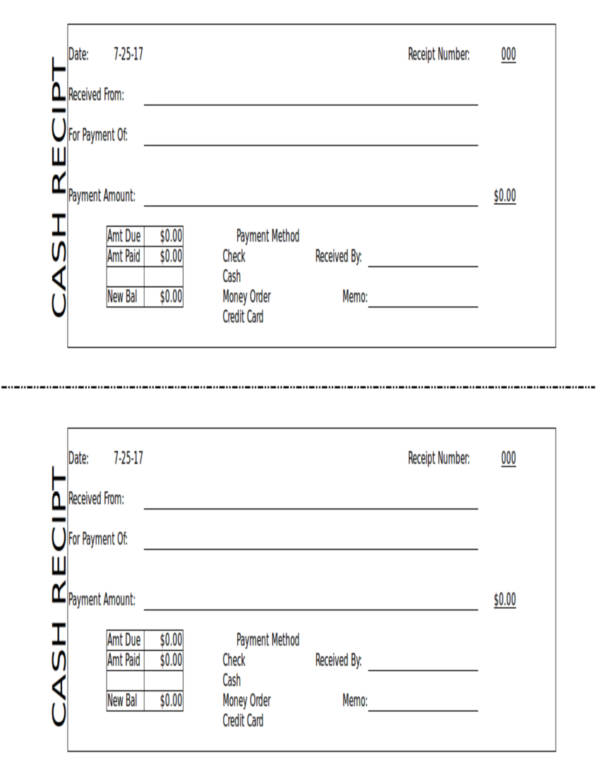
Cash Receipt Template
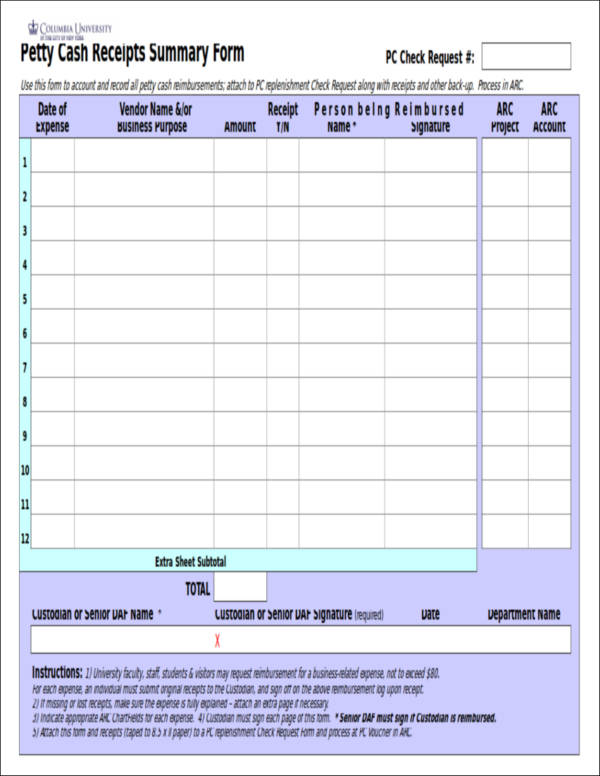
Petty Cash Receipt
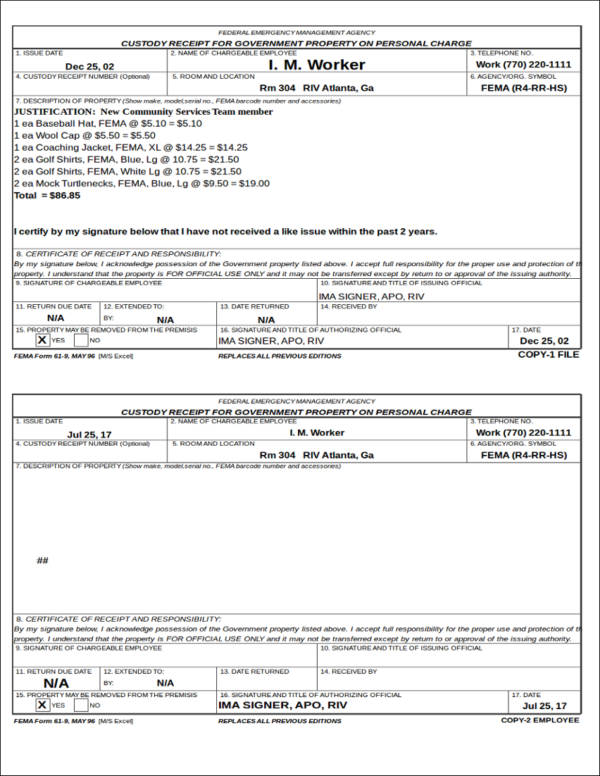
Generic Hand Receipt Sample
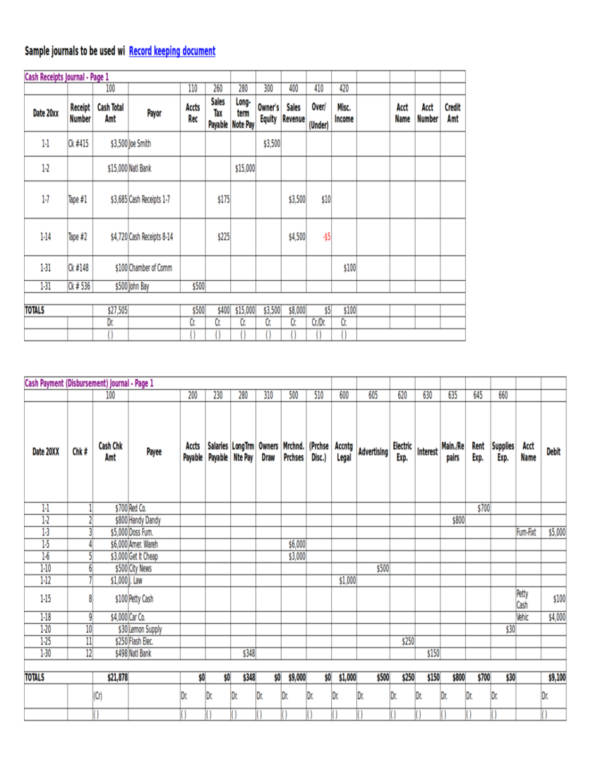
Examples of a Cash Receipts Journal
Creating Your Receipts Through Excel
Making receipt through Excel is definitely a good idea. You can readily make a template wherein by adding the items the customer has brought, the total amount to be paid is automatically added by the assigned cells. This makes it very convenient as you can readily print these after inputting the items sold and their corresponding prices. You can even program your Excel sheet to have a dropdown box where you can conveniently choose from a list. However, should you find these programming and dropdown box too complicated for your taste, you can still make this into a receipt template that you can print out and manually fill out.
There are two ways on how you can make your very own receipts through Excel: creating it from scratch and making one by making use of the payment receipt templates available in Excel. We will walk you through each method and we will also be letting you in on a few tips and tricks to make your Excel sheet calculate total payment and record
Making Your Receipts from Scratch
- Step #1: Open an Excel workbook. After opening the Excel application, take care of the layout you will use for your receipts. To do so, go to the View tab of Excel and click on Page Layout. This will enable you to have a quick glimpse as to where the borders will be located if you will use a letter-sized paper (8″ × 11.5″). You may also change the size of the paper you will use by going to the Size option in Page Layout.
- Step #2: Add basic information about your company. Start adding in the name of your company, address, and telephone number. On the right side of the template, write the word Receipt or Receipt No. and have a few cells after it where the receipt number will be written. The date when the receipt was issued is important in a receipt. Include a section where this will be filled out.
- Tip: You can program the date to automatically fill in by typing Now() on the cell where the date is supposed to reflect.
- Step #3: Add the headers. You may choose to have a highlight color for the cells where the headers will reflect. Add a line or a double line to separate this section with what the customer has purchased. To have a highlight color, click on the Fill icon and choose the color you want to use. To add a line, choose Border icon and choose the line you want to use. Include the following headers:
- Quantity/Units
- Item/Product
- Price Per Unit
- Discount/s
- Total
- Step #4: Add the last few sections of your receipt. You may also choose to fill these parts with the same color you used for the headers. The last few sections will include:
- Subtotal – Typically, the bottom of the cell will be double-lined.
- Tax – Have a single line at the bottom of this cell.
- TOTAL – Double line the bottom of the cell.
- Step #5: Separate each section. You can make use of the Border icon and choose Box Border.
- Step #6: Change from General to Currency. Highlight the empty cells where prices will be displayed such as empty cells for prices and totals, click the Number menu from the Home tab, and click on Currency.
- Step #7: Add a Notes section. This is an optional step. You can make use of some of the extra space as a notes section where you can place additional notes about the transaction.
Creating Receipts from Pre-Made Templates
There are a ton of pre-made business receipt templates available on Excel. If you want to skip the time-consuming process of making your own receipt template, you can access the templates by following these steps.
- Step #1: Access the templates. After opening your Excel worksheet, click on File. There will be an available search tab where you can type what template it is that you are looking for. In this case, type the word receipt. Click Create. After clicking on Create, a ready-made receipt template will appear your Excel sheet.
- Step #2: Time to replace the template’s elements with your own business details.
- If you have a company logo, you may replace the section that says Your Logo Here or Place Company Logo Here. This is typically found on the left-hand side of the template. Should you not want to include your company logo, you may skip this. Instead, you can type in your business name in place of the logo.
- Step #3: Test it out. Check if all the formulas in the cells are good to go. Test it out by putting random numbers and checking if the total is correct. Should it not be correct, you may replace the formula.
Adding Formula to Your Cells
Adding a formula or a couple of formulas to your Excel receipt template will make it more convenient as these will automatically compute the total, subtotal, and taxes automatically. This part of the tutorial is actually helpful for those entrepreneurs who prefer to make their own printable receipt form from scratch. You may also use the instruction here as a guide to see if the formulas in the pre-made Excel receipt template are correct.
- Step #1: Adding a formula to the Subtotal cell. By doing this, everytime cells in the Total cells are filled out, it will automatically add the values.
- Option #1: Click the Subtotal cell. Click on the Formula tab and click on the AutoSum icon (?). You will be asked to choose which cells need to be added automatically. Drag all of the cells under the Total column.
- Option #2: Click on the Subtotal cell. Type in Sum( and drag all of the cells under the Total column. Add a closing parenthesis and press Enter.
- Step #2: Adding a formula to the Tax cell. This will automatically compute the total tax of the items purchased by the buyer.
- Click the Tax cell. Type an equal sign (=) and click on the Subtotal cell. Add an asterisk (*) and the tax. Press Enter. Rember to type the tax in decimal point instead of in percentage format. For example, 7% should be typed as 0.07.
- Step #3: Adding a formula on the Total cells. This will make the computation of the total units purchased by the price per unit a whole lot easier.
- Click the first empty Total cell. In this cell, type in =[First Unit Cell]*[First Price Cell]?First Discount Cell. Press Enter.
- To let the following Total cells automatically compute, click on the first Total cell then drag to the rest of the Total cells. This will copy the formula to the other cells.
- Step #4: Leave cells with no values blank. To avoid seeing a ton of $0.00 values, go to File, then select Options and then Advanced. Uncheck the Show a Zero in Cells That Have Zero Value and click OK.
- Step #5: Check if it matches. If all the values are correct upon entering values in the cells, you are good to go.
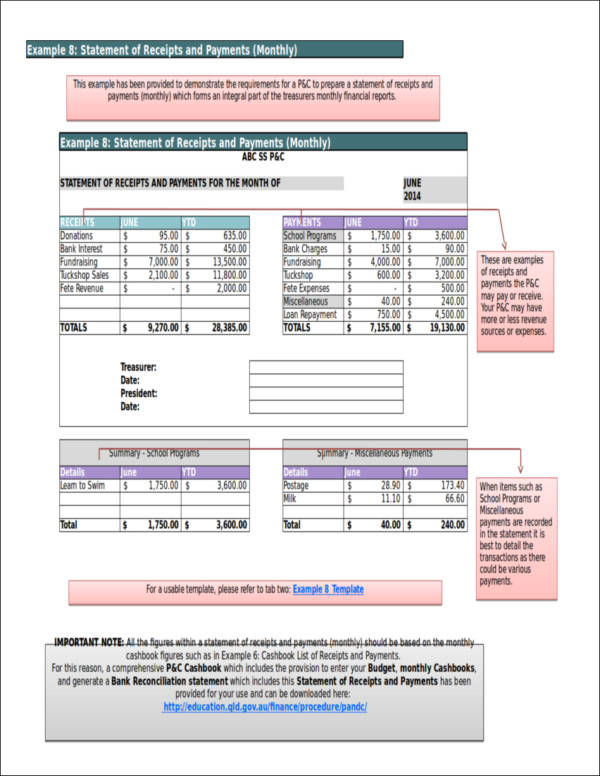
Statement of Receipts and Payments
Cash Receipt Template for Excel
Importance of Keeping Receipts
Receipts serve as a proper documentation of a business sales transaction. It gives a breakdown of what has been bought, the price of each item, discounts, and the total amount paid by the customer. It is also highly likely that whatever business you may own, you will be dealing with receipts a lot. Keeping it organized will help to make a lot of things easier.
But why are receipts given so much importance? We will give you two simple reasons.
Dealing with Chargeback
What is chargeback? A chargeback is a circumstance wherein a customer will demand his/her funds to be returned to his/her credit card.
When do chargebacks occur? Chargeback typically occurs when a customer disputes the following:
- Validity. Oftentimes, customers will question whether or not a charge is valid. If you have a copy of the receipt and it has been signed by the customer, it is a good way of protecting yourself from this claim should it be wrong.
- Wrong product. Customers will also sometimes claim that they were provided with the wrong product during the sales transaction. Having a receipt with all the complete details of what products have been purchased by the customer will help to prove that they were provided with all the correct items.
- Amount paid. Receipts will help you to prove that the customer agreed to pay the amount reflected in the receipt should he/she question the accuracy of the amount that was paid.
Tax Purposes
Every single one of your receipts is important. The ones you issued and the ones you receive from other merchants. All of these receipts are important and are very useful during the time when you will file your taxes. It can help you keep track of your cash flow and keep your expenses in check.
It is recommended that you keep your receipts for at least three years. However, some accountants might give you a different answer. Nonetheless, professional advice should always prevail.
Wouldn’t the receipts clutter up your office? Worry not! There are a lot of ways on how to organize your business receipts and one of them will be to scan each one and save these on your computer. This is where you will probably start to appreciate the beauty of digital receipts as they help you avoid the clutter.
Final Thoughts
Receipts have evolved in various ways throughout the years. They may not be given much attention to by customers, however, as a business owner, you should always care about these things and you should always ensure that your copy of receipts is well organized. That’s the beauty of transitioning to digital receipts. You may opt to send the customers a copy of the receipts via email or have it printed after everything has been inputted. Everyone does not like the idea of clutter, so having receipts emailed is a better alternative to the traditional pen and paper receipts.
Why are digital receipts more advantageous? One simple answer would be that there is a lesser chance that you will lose your digital receipt compared to paper receipts. It will also be easier to access through mobile phones.
If the customer chooses to have his/her receipts emailed, you are in a great deal of luck! That just opened a window for email marketing! However, you should still ask your customer if they would be willing to receive marketing emails as unwanted emails might just drive them away.
All of these rooted from the simple task of creating your receipt templates from the humble Microsoft Excel. If you are also issuing invoices to your customers, there are also a ton of standard invoice templates you can check out in Excel. You see how simple things can actually bring something innovative and amazing opportunities? Technological advancements work in mysterious and awesome ways. Sometime in the future, however, you might find yourself looking for a better way of issuing receipts. There are actually a couple of software that you can purchase but they are going to be costly, especially for start-up businesses. This is why utilizing what you have available at the moment is definitely a must.
We are hoping that you found this article helpful. A quick reminder: all of the sample templates we have can be downloaded at no extra cost. They will also save you time and money, as well as be able to run your business in a more organized manner. Keep in mind that time saved is also money saved. All of the sample receipts in this article are easy to edit and you can even customize it accordingly with your preference.
Good luck with your business and we are hoping for a sweet success in the months and years to come.
Related Posts
FREE 6+ Parking Receipt Samples in PDF | MS Word
FREE 8+ Car Payment Receipts in MS Word | PDF
FREE 8+ Loan Receipt Templates Examples In MS Word | PDF
FREE 16+ Printable Hotel Receipt Templates in PDF | MS Word
FREE 6+ Sample rent receipt form in MS Word | PDF
FREE 10+ Sample Receipt Voucher Templates in PDF | MS Word
FREE 10+ Fee Receipt Samples in PDF | MS Word | Google Docs | Excel | Apple Numbers | Apple Pages
FREE 7+ Vehicle Sales Receipt Samples in MS Word | PDF
FREE 13+ Taxi Receipt Templates in PDF | Google Docs | Google Sheets | Excel | MS Word | Numbers | Pages
FREE 10+ Receipt Book Samples in PDF
FREE 10+ Online Receipt Samples in MS Word | Google Docs | Google Sheets | MS Excel | PDF
FREE 10+ Personal Analysis Samples in MS Word | Google Docs | Pages | PDF
FREE 5+ Non Profit Receipt Samples in PDF
FREE 10+ Advance Receipt Samples in PDF | DOC
FREE 3+ Investment Receipt Samples in MS Word | Google Docs | Google Sheets | MS Excel | PDF